Kubernetes on the Cheap - Part 2
If you haven’t read part 1 yet, that’s a good place to start.
In the last post, we were left with a kubernetes cluster, and a test deployment that would break once every 24 hours, because of the preemptible instances we are using. So the highest priority right now is to fix that.
The next step is going to require you to own a domain. I recommend namecheap. You can get a .com for $8.88/yr for the first year, then $10.98/yr after that.
Table of Contents
- Table of Contents
- Create a DNS Zone
- Deploy External DNS Controller
- Edit the hello app to include the domain, and updated ttl
- Conclusion
To make your life easier, I’ve variablized the commands in this post, so that you can simply set the variables, then copy/paste the commands without much trouble.
export PROJECT_NAME="kubernetes-on-the-cheap"
export CLUSTER_NAME="hobby-1"
export DOMAIN="foo.com"
Create a DNS Zone
gcloud beta dns \
managed-zones create "${DOMAIN}" \
--description="${DOMAIN}" \
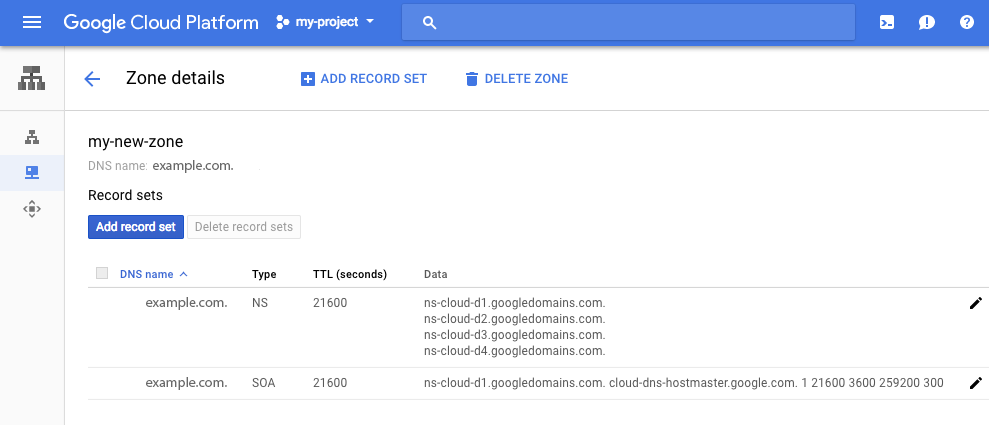
--dns-name="${DOMAIN}."Once the DNS zone is created, you need to update your domain registrar with the google name servers.
When viewing the zone, you should see an NS record with values like ns-cloud-<??>.googledomains.com.
If you chose to use namecheap, here’s how to update DNS on namecheap.com.
Deploy External DNS Controller
Some of these steps came from knative
Create a new service account for Cloud DNS admin role.
export CLOUD_DNS_SA=cloud-dns-admin

gcloud --project $PROJECT_NAME iam service-accounts \
    create $CLOUD_DNS_SA \
    --display-name "Service Account to support ACME DNS-01 challenge."
Bind the role
dns.adminto the newly created service account.# Fully-qualified service account name also has project-id information. export CLOUD_DNS_SA_FQ=$CLOUD_DNS_SA@$PROJECT_NAME.iam.gserviceaccount.com gcloud projects add-iam-policy-binding $PROJECT_NAME \ --member serviceAccount:$CLOUD_DNS_SA_FQ \ --role roles/dns.adminDownload the secret key file for your service account.
gcloud iam service-accounts keys create ~/credentials.json \
  --iam-account=$CLOUD_DNS_SA_FQ
Upload the service account credential to your cluster. This command uses the secret name
cloud-dns-key, but you can choose a different name.export CLOUD_DNS_SECRET_NAME="cloud-dns-key" kubectl create secret generic "${CLOUD_DNS_SECRET_NAME}" \ --from-file=credentials.json=$HOME/credentials.jsonDeploy external dns.
curl https://ghostsquad.me/files/kubernetes-on-the-cheap-part-2/external-dns.yaml -o external-dns.yaml
sed -i "s/__PROJECT_NAME__/${PROJECT_NAME}/g" external-dns.yaml
sed -i "s/__CLUSTER_NAME__/${CLUSTER_NAME}/g" external-dns.yaml
sed -i "s/__CLOUD_DNS_SECRET_NAME__/${CLOUD_DNS_SECRET_NAME}/g" external-dns.yaml
kubectl apply -f external-dns.yaml
Edit the hello app to include the domain, and updated ttl
curl https://ghostsquad.me/files/kubernetes-on-the-cheap-part-2/hello.yaml -o hello-part-2.yaml
sed -i "s/__DOMAIN__/${DOMAIN}/g" hello-part-2.yaml
kubectl apply -f hello-part-2.yaml
Conclusion
We deployed external DNS so that it can keep the cluster updated with an IP address for your domain name. I even watched it go to work by scaling up to 2 nodes, then scaling back down.
It doesn’t appear though that externalDNS is adding multiple A records (for each IP) when you have 2 nodes. This deserves some more research.
Stay tuned for Part 3!